
My standing desk
4 April 2015
I always wanted a standing desk. I attribute it to growing up working in a server room for my dad's company. In most server rooms you generally work standing at a rack of servers and I spent a few too many sleepless nights trying to solve a particular server problem standing in front of a server rack, staring at a monitor.
At Freightview, we have some furniture made from pipe and topped with wood (actually made of pallet wood, after all we are in the freight industry), building something with these materials seemed simple enough that I could do it fairly easily and it even looks pretty cool. So, when I came up with the idea to build a standing desk, these materials were the first thing I thought of.
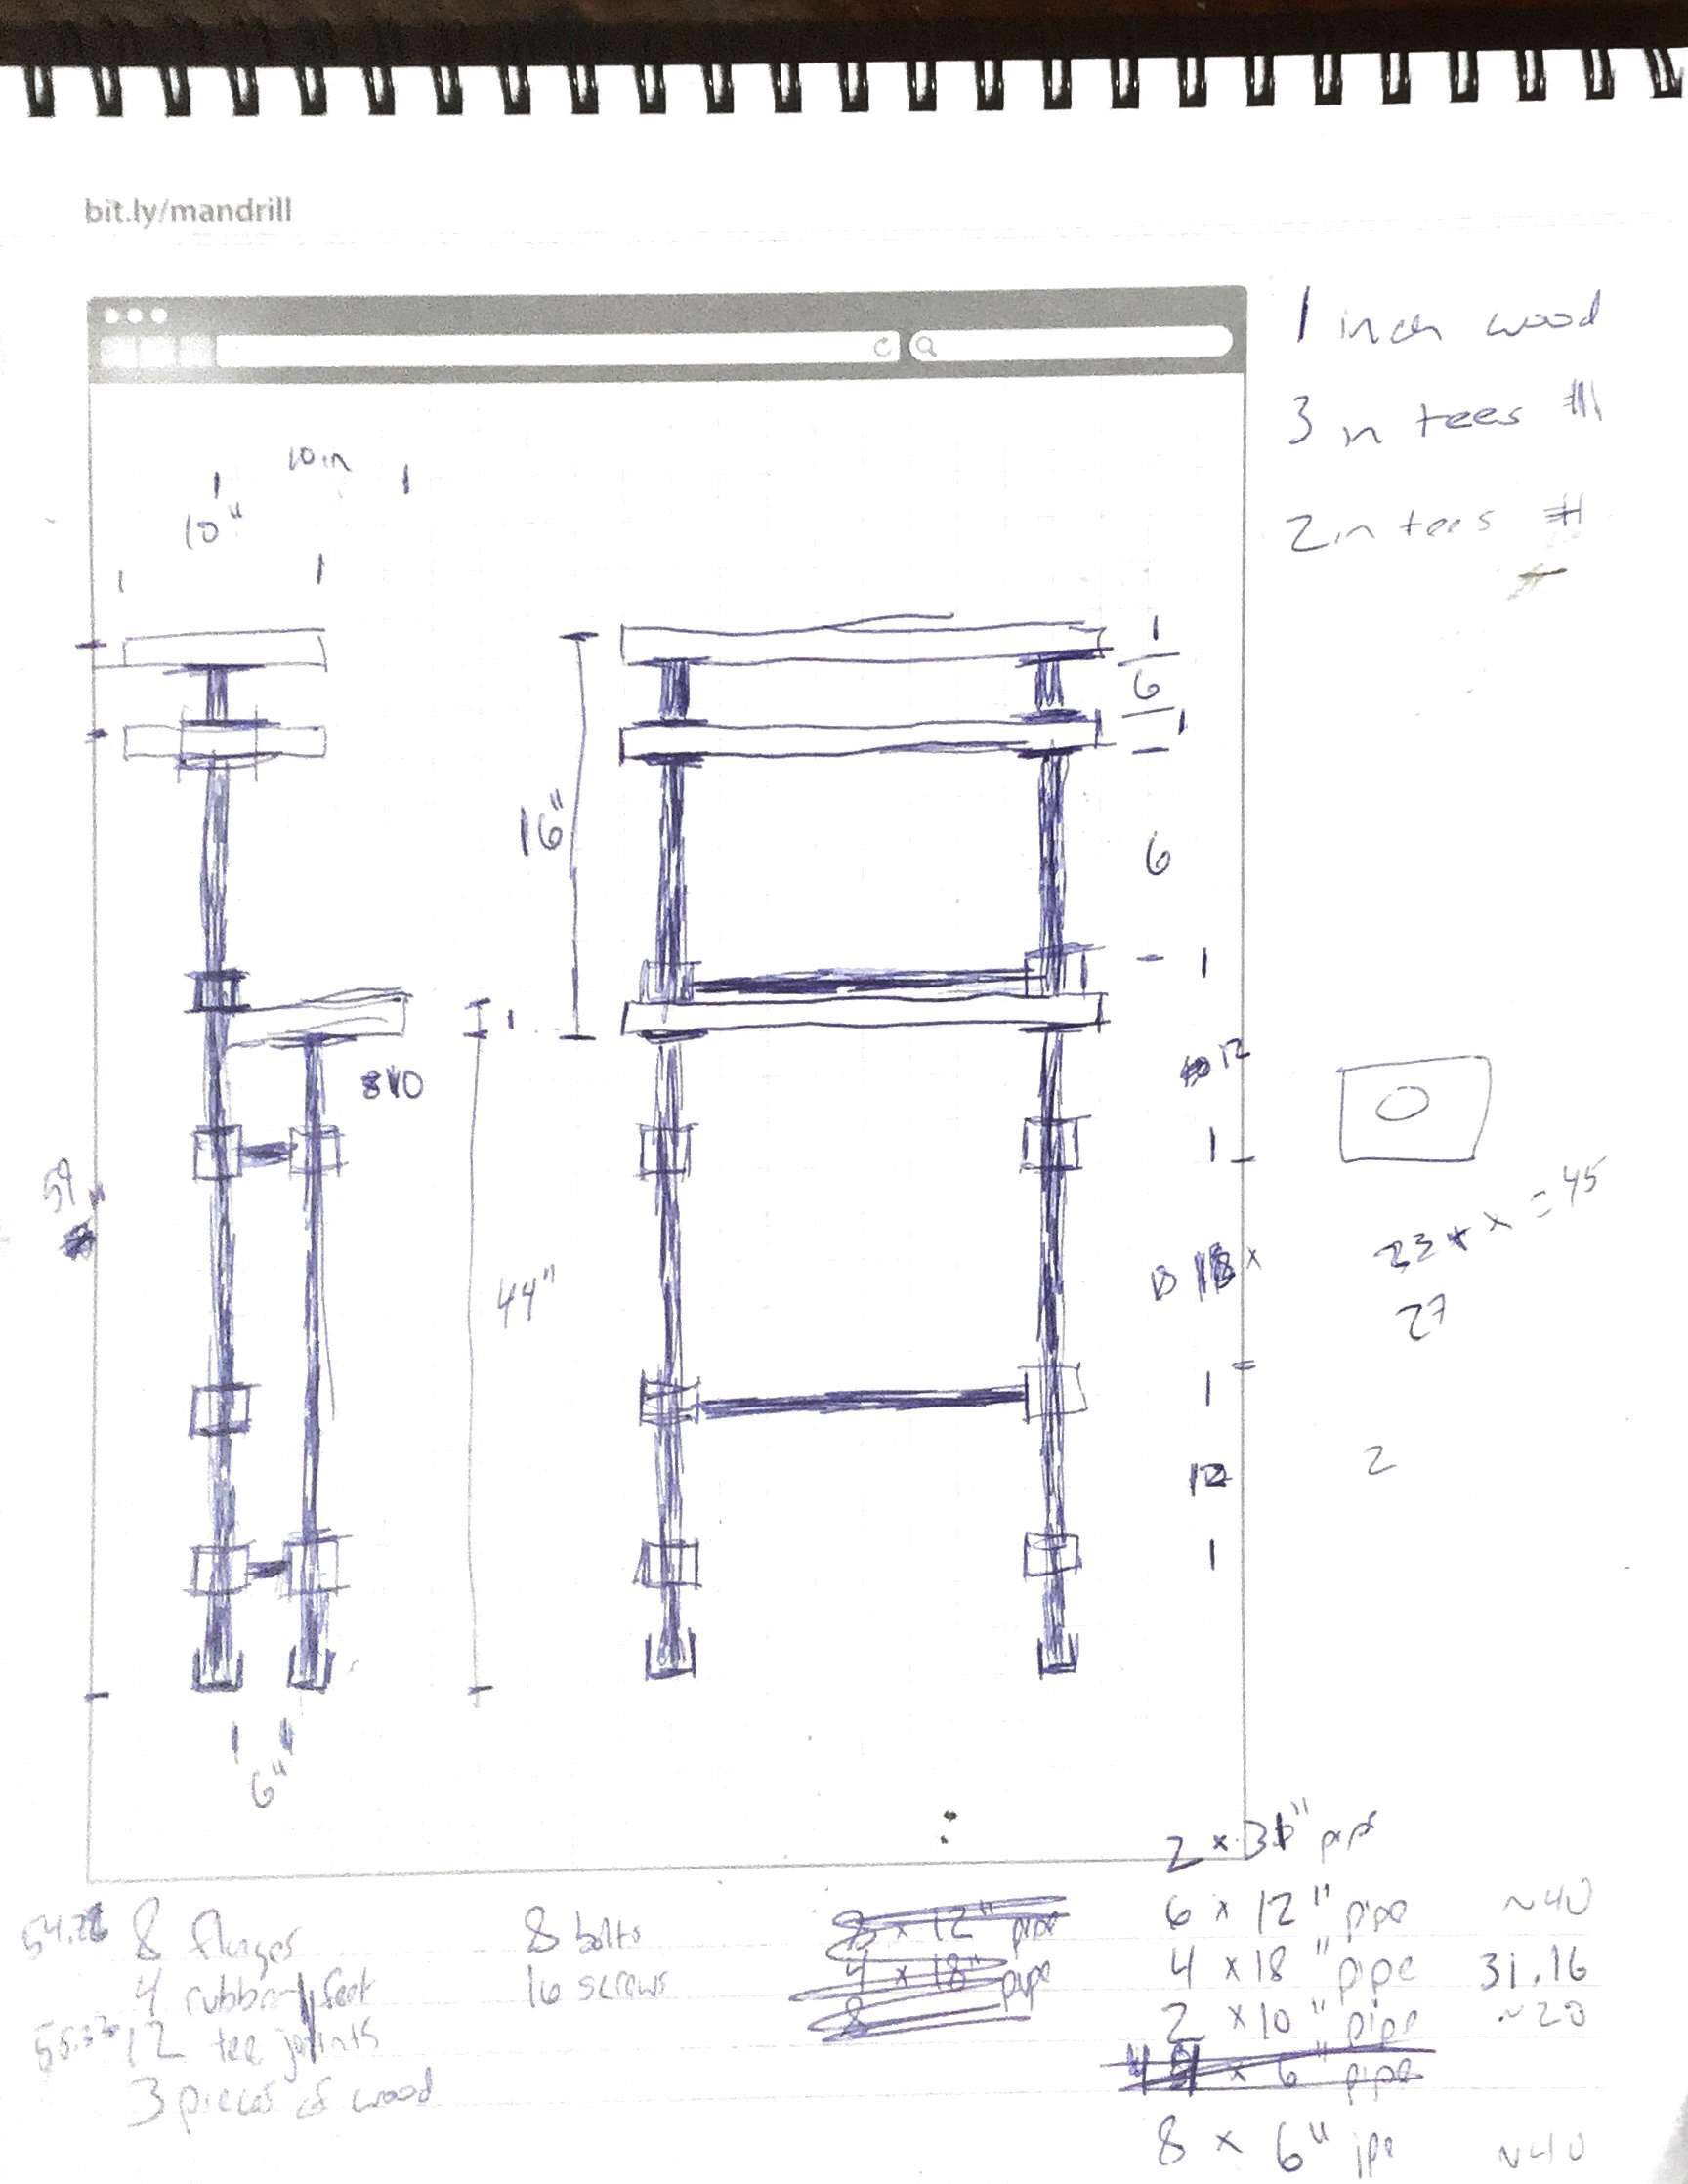
Before I went and purchased my initial materials, I sketched a quick plan for how the desk fit together in my awesome Mandrill UI Sketchbook. The final design ends up being a bit different.
The middle shelf was originally supposed to be for my MacBook and the plan was to use a monitor on the top shelf, but due to the level of the screen and the viewing angle, it just doesn't work. However, the screen on my MacBook Pro is way better than any monitor I have, so it makes sense to make it my main screen, at least while standing. I usually run Duet on my iPad, which allows me to use my iPad as a second screen for my laptop and it does fit well on that middle shelf.
Now, this isn't the cheapest standing desk you can make, but if you are looking for something cheaper or less permanent, there are plenty of other options on google.
The pipe and especially the joints are what are pricey here. I spent way more time than I care to admit at both Home Depot and Lowes buying different lengths of pipe.
Also, you should note that I built this desk pretty much exactly to my height and space I put it in. If you find yourself following this as a guide for your own standing desk, you'll probably want to tweak some of the pipe lengths, because I'm 6'5".
Parts
I used 1" pipe for the entire desk
- 4x 24 inch pipes
- 4x 12 inch pipes
- 6x 10 inch pipes
- 4x 4 inch pipes
- 6x 2.5 inch pipes
- 6x floor flanges
- 14x T joints
- 4x 90 degree elbows
- 2x 30 inch standard 2x10s (lumber)
- 1x 30 inch standard 2x12 (lumber)
- 8x 2.5 inch bolts
- 16x screws
- 4x rubber feet
Putting it together
I didn't weld any of the joints on my desk, because it doesn't seem to really need it. Once you get the wood shelves screwed down, the whole structure gets very sturdy.
There are a few places that require reverse threading two pipes because the pipes form a rectangle. When this happens, the easiest way to handle it is to screw two of the pipes fully in to one side and then you get the other side lined up with the opposite end of the pipe that you just screwed in. Now, you unscrew that same pipe and as you unscrew from the opposite side, it screws into the current end. This leaves you with a connection that isn't as tight as it should be, but it works, and thanks to the design of the desk, its sturdy.
I ended up putting three coats of stain and two coats of polyurethane on the wood for the shelves.
The final product

I think it turned out well. I certainly enjoyed working from it last "Work from home Wednesday" at Freightview.